Pages

Thursday, November 29, 2012

More Fun Charms

During the summer we had a couple of swaps that had such fun and unusual charms. First was 'Roadside Oddities'. Remember those fun places to visit on long road trips like the world's largest ball of string--world's largest thermometer--motel rooms that look like TeePees? Each charm had the attraction and a map included in some way, along with a description.  So fun to see all the wacky things people see fit to commemorate. Another was 'Picnic Time' with all you would find on a nice summer picnic -- even ants! Amazing what realistic miniature food you can make with polymer clay. My charms had been sitting on my desk for the longest time while I thought of what I could do with them. Was thinking I didn't want to make bracelets with them but didn't know what I did want to make.  Last month we were going to a potluck and I got out my Hula Girl food covers.  I've had them forever and love to use them but when it's windy, they blow off the table so easily. I had thought of sewing on some metal washers to weigh them down but that seemed so boring. Weights! The oddities and picnic charms would make such fancy weights for my food covers!  I tacked on some ribbon to towards the bottom of the covers and attached the charms with their jumprings.  That way I can add on more later if I want (or if they weren't heavy enough and needed more).  Luckily I had joined for 2 sets of the 'oddities' so I had several to use.  I added a few other miscellaneous food charms I had also.  Here they are.....

and close ups .....


Aren't they the cutest ever? :)

Here are my charms for the swaps....

I made my ball of string out of Polymer Clay (great stuff!).  Love how Mr. Stephens refers to his 'largest ball of string - not twine', always emphasizing the 'not twine' so there is no confusion!  If you are ever in Weston, MO be sure to stop in to see it!

My other Roadside Attraction featured a favorite place we use to visit on our way to Palm Springs.  Along side the freeway stood two large dinosaurs - a Brontosaurus and a Tyrannosaurus. This photo was taken when Kyle was about 4 I think.  He LOVED dinosaurs and could identify any pictures of them you showed him and tell you all about each one.  His favorite bedtime book was a Dinosaur Dictionary... go figure :)  But I do wish I still had that book since Sammy is showing the same interest now.  He'd love it too.

From what I've read about the dinosaurs in the desert, it seems someone has bought the property and now has it set up as a little park (that you have to pay admission to) and added more dinosaurs so it's not quite the funky dinosaurs just sitting off the freeway in the desert.  Still would probably be cool to go see if you're in the area.

These cute little hamburgers were my contribution for 'Picnic Time' - they were also made with Polymer Clay.  That stuff is great!  So easy to use.  I definitely recommend trying it if you haven't done so already.  There has been some concern over it's safety since you have to cure it by cooking it.  The companies that make it ensure the fumes are non toxic if cured as directed, not letting it get over a certain temperature.  Just to be safe, I bought a toaster oven at a thrift shop and use an oven thermometer.  Since our weather permits year round use of the lanai, I also cook it outside.  On the mainland I used a dedicated casserole dish and just used our kitchen oven. That worked fine too.

Hope you had fun looking at these charms :)


Wednesday, November 21, 2012

Long Time, No See!

Aloha!  Yep, it's been awhile....we've been crazy busy with friends and family visiting the island and we have taken full advantage playing tourists and travel guides and generally having a great time.  I have had time to play in my studio a bit as well and thought I'd share a couple of things with you on this pre Thanksgiving Day.

One thing I am thankful for is my great Art Charms group.  So many talented and clever people sharing their little art treasures.  Such a fun way of staying creative, making little goodies when I get busy with other things in life and don't have time for big projects.  And the best part is when my envie shows up in the mail.....

A recent swap was hosted by our oh so talented Dana James.  You know all those great buttons sitting around tins or coffee cans from Grandma or Great Aunt  Doris?  Well Dana thought we should dust them off and make some charms with them. What a great idea!


Aren't they wonderful?  Did I mention that I just love it when my package arrives?  Better than Christmas!  These are all so cute--I wanted to do something special with them.  I remembered seeing a bracelet made with buttons in a Easy Wire jewelry magazine and went through my old copies and found it!!  Woohoo! (I usually can't ever find the one article I'm looking for--and of course, it's lost again so I can't tell you which issue it was in--sorry about that!)  Went to work and here's what I made...

I love the way it turned out.  I used a heavy copper wire (16 gauge, I think) for the bangle part, curved it into a circle a half inch bigger than needed to slip over my hand.  I flattened out the ends with a hammer and drilled two holes in each side.  (I think the article said to rivet it but this was easier for me since my riveting skills aren't so hot)  I started with the big button in the front and threaded a long piece of 26 gauge copper wire through the button holes and into the holes on the flattened part of the 16g wire, then started wrapping and attaching the smaller buttons in each direction ending towards the back.  I did run out of the thin wire and had to ad more--just twisted one another long piece.  You can kind of tell on the left side in the photo but it wasn't really that noticeable.  I tried at first to use just a couple of wraps for each button but found the more wraps, the more secure the buttons were and they didn't slip around so much.  To end it, I just tucked the last bit under some of the wrapped wire and made sure none was poking out.

Pretty cute, yah?  But wait....  It's even better with everyone's cool button charms!


(it's hard to take a photo of your own wrist!!)


A BIG Mahalo to my Button Charm buddies and especially to Dana for hosting another great swap!

Hope everyone has a great day with family and friends tomorrow.  Happy Turkey Day :)


Friday, July 27, 2012

Welcome to the Party!!

Bead Soup Blog Hop Party that is!  Well, I'm fashionably late for the party :)  It started at midnight East Coast time and here I am, almost 2 am your time...8 pm here in Hawaii. Are any of you really up and hopping now? I bet there are some of you!  After you've looked through my photos, check my last post for the list of participants for this 'First Reveal' and see what amazing things party goers have created.  I am always so impressed with the talented people that join in.

And a BIG Thank You to Lori Anderson for once again putting together another wonderful party for us all--what an undertaking!!

Here's what I've been stirring up with my luscious soup fixings...


I just love the little lampwork glass Earth Mother focal bead Niky sent.  Isn't she perfect?  And those little white polka dot black beads are just the cutest ever. I used most everything Niky sent.  Just a few treasures left for some special additions to other pieces.  Necklace, Bracelet, and Earrings -- A perfect set for me!

Here are some close ups....


And my bracelet...


I'm very happy with the Necklace and Earrings.... but not so sure about the Bracelet.  I felted rushed to finish and post photos tonight so it may change a bit. I'll let you know :)

So....Get yourself a little something to drink and maybe a little snack, sit back and go visiting!  Thanks for stopping by!

WooHoo! Almost Soup Time!

Had to take a break from creating since I realized I haven't even posted my delicious Bead Soup from Niky Sayers of Silver Nik Naks yet.  It finally arrived this week and was well worth the wait!!!  It's difficult finding just what you want to send for someone's soup, especially if you've never met them or aren't  familiar with their style and tastes.  But that is what Bead Soup is all about--getting out of your rut, err, I'm mean comfort zone, and trying something new.

Niky picked a lovely, perfect soup mix for me!  See had looked at my past blog posts for ideas and saw the one about Zentangles. I normally use lots of color in my artwork with the execption of Zentangles (little black and white drawings--kind of like doodles but with more focus).  Zentangles are kind of like a little a break for me from my normal creating and want to turn my brain off.  How fun to carry that over to jewelry!!  Here are my goodies....

First, look at how cool this box is!  Niky drew a clever little Zentangle on top! You just know there are treasures inside :)


And there are!! Niky even drew little tangles on the black and white envies that hold the soup...


and a close up of the loveliness.....


Just look at all the goodies to play with--yum!

Here's the focal bead...  (the clasp is on the upper left in the photo above--the cute little copper flower)


It's hard to see in the photo but it is a lampwork glass torso!  So cute :)  It reminds me of the Venus of Willendorf; a little 25000 (give or take) yr old Mother Earth  Goddess sculpture that you probably would never have even heard of unless you've taken numerous Art History courses haha.  What a great focal!!

I'm having lots of fun with my treasures Niky.....MAHALO NUI LOA!!

Be sure to check back tomorrow to see what I've made.  Midnight tonight Eastern Time is the First Big Reveal of the Bead Soup Blog Party....let's see, that is 6 pm here in HI--I'd better get busy and finish up!  Below is the list of the first group that will be posting for July 28th.  And if you have no idea of what this Bead Soup Blog Hop that I'm talking about is....Check out LORI ANDERSON'S Bead Soup Blog Hop site  HERE!


Don't miss the party!

Here are the party dates and attendees:


 Hostess, Lori Anderson, PrettyThingsBlog.com


Alice Craddick,  Alice's Beads and Baubles
Alicia Marinache,  All The Pretty Things
Amanda Tibbetts,  Amanda Made
Amber Dawn Goldish, Inventive Soul
Annita Wilson,  AW Jewelry
Beti Horvath, Stringing Fool
Birgitta Lejonklou,  Create With Spirit   
Candida Castleberry,    Spinning Spun Sugar
Carolyn Lawson, Carolyn's Creations

Cassie Donlen, Glass Beadle
Cheryl McCloud,  One Thing Leads to Another
Cheryl Roe, BeadRoe
Christina Hickman, Vintage Treasures Jewelry
Christine Hendrickson,  Clamworks
Cilla Watkins, Tell Your Girlfriends
Cindy Wilson, Mommy's Dream
Cindy Wimmer, Sweet Bead Studio
Cory Celaya, Art With Moxie

Cory Tompkins, Tealwater Designs
Cris Peacock, Cris' Page
Cynthia Deis, Shiny Little Things
Cynthia Machata, Antiquity Travelers
Cynthia Wainscott, Exotic Peru
Dana Hickey, Magpie Approved
Denielle Hagerman, Some Beads and Other Things

Diane Valasek, Dragonfly Close
Doris Stumpf, Glaszwerg
Dyanne Everett-Cantrell, Dee-Liteful Jewelry Creations
Elaine Robitaille, Too Aquarius
Eleanor Burian-Mohr, The Charmed Life
Enikö Fabian, Perl-eni
Erin Prais-Hintz, Treasures Found
Heather Davis, Blissful Garden Beads
Heidi Post, Ex Post Facto Jewelry

Hilary Frye, FryeStyle
Inge von Roos, Inge's Blog
Jami Shipp, Celebrating Life
Jayne Capps, Mama's Got to Doodle
Jennifer Cameron, Glass Addictions
Jennifer Pottner, Rock Candy Beads
Jennifer VanBenschoten,  Jewelry, Art and Life

Jenny Davies-Reazor, Jenny Davies-Reazor
Jenny Vidberg, Shyme Design
Jessica Dickens, My Jewelry, My Life, Me
Jessica Klaaren, Beadful-Things by Jessica
JJ Jacobs, Coming Abstractions
Joan Williams, Lilruby Jewelry
Judith Johnston, Judith Johnston
Judy Riggs, Rigglettes
Judy Turner, Silver Rains

Julie Anne Leggett, The Peaceful Bead
K Hutchinson, Jumbled Hutch
Karen Meador, Dreamcatcher Ranch
Karyn Bonfiglio, Plus Size Bangles
Katherine Gale, Terra Beadworks
Kathleen Lange Klik, Modern Nature Studio
Katja Benevol Gabrijelcic, Slovonske Technobe
Kelli Jacobson, Creative Moon
Kelly Ramstack, Adventures with Kelly
Keri Lee Sereika, Pink Lemonade

Kim Bender-Hora, KimmyKat
Kirsi Luostarinen, Kirsi Luo Korut
Kitty Bozzini, Kitty Lampwork
Laura Demoya, The Bead Therapist
Laurie Hanna, Laurie's Jewelbox
Leah Curtis, Beady Eyed Bunny
Lesley Watt, The Gossiping Goddess
Linda Inhelder, Must-Haves Jewelry

Lisa Liddy, Metal Me This
Mallory Hoffman, For the Love of Beads
Marge Beebe, Rock Creek Creations
Marianna Boylan, Pretty Shiny Things
Marion Simmons, Shade Tree Studio
Marla Gibson, Spice Box Design
Marta Weaver, Marta Weaver Jewelry

Marti Conrad, Marti C's Clay Blog
Maryse Fritzsch-Thillens, GlassBeadArt, Lampwork Beads
Melanie Brooks, Earthenwood Studio
Michelle Hardy, Firefly Visions
Mikala Coates, Maybe Just Perhaps
Mowse Doyle, HoCArt
Nancy Boylan, Snazzy Doodle Designs
Nancy Peterson, Beading From the Heart
Nicole Rennell, Nicole Rennell Designs

Niki Meiners, 365 Days of Craft
Niky Sayers, Silver Nik Nats
Norma Turvey, Moonlit Fantaseas
Paige Maxim, Paige Maxim Designs
Pamela Gangler, She Always Loved Pink
Patricia Johnson, Patricia L. Johnson Glass Art
Perri Jackson, Shaktipaj Designs
Raida Disbrow, Havana Beads
Renetha Stanziano, Lamplight Crafts
Shannon Hicks, Falling Into the Sky

Shannon LeVart, Miss Fickle Media
Sharon Driscoll, Right Turn Art Werks
Shelley Graham Turner, Fabric of My Life
Sherri Stokey, Knot Just Macrame
Shirley Moore, Beads and Bread
Skylar Bre'z, Brising Beads
Stacie Florer, Soul to Substance
Stacie Stamper, Park Avenue
Stacy Alderson, Iridal's Attic

Stephanie Haussler, Pixybug Designs
Stephanie Stamper, Rainy Day Designs
Suzette Bentley, Ellie's Bijoux
Tammy Jones, Jewelry Making Daily
Tanty Sri Hartanti, TJewellicious by Tanti
Terry Matuszyk, Pink Chapeau

Vonna Maslanka, Just Vonna


Hope you get to play in your studio today too!  Go make something!  Cris

Tuesday, July 10, 2012

Still waiting....

No special package from England yesterday .... but I'm just sure it will arrive today!  Since I can't show you my lovely beads from Niky, I thought I would give you a little eye candy from a 'Cup of Soup' exchange with bead buddies Dana James and Leslie Wayment.  This was a little swap for an in between Bead Soup Party.  They sent such lovely beads and stones.  Here are a few of the goodies I made...


The beautiful lampwork sea star is from Dana that a friend of hers made.  I just happened to have the light green beads in my stash that I had been saving for something special.  They are exactly the same color as the spots on the sea star!

On the necklace below I used the wonderful sand dollar carved from a nut that Leslie sent.  In both the necklace and bracelet I used Leslie's, Dana's and some of my own beads for accents.  I'll let you know what the postman brings today!!


Monday, July 09, 2012

It's Bead Soup Time Again!

Aloha!  I'm taking a break from watching for the postman to send you a note about Bead Soup.  My package should be arriving TODAY!!  My partner for this round is Niky Sayers from Esher in the UK.  You can visit her blog, Silver Nik Nats, to see her lovely creations.  Niky received the soup I sent her last Friday so I can share a photo of what I sent for her to play with....


From looking at her blog and etsy circles I thought she would enjoy playing with this jade butterfly and some lampwork beads.  I went though my stash and found some accent beads and chose copper findings just because I love the look of copper and green together.  Since Niky lives across two ponds, thought she might like some little treasures from Maui so I included some shells I find on walks on the beach that I like to use in my jewelry.  Just had to send along the three little lampwork cupcakes when I saw the amazing cake she made for her daughter's birthday on her blog!  (be sure to get a peek of it when you visit her blog)

Well....guess I'll head back out to the curb to wait for the postman :)  Have a great day!

Saturday, June 09, 2012

A New Obsession...

I've been having fun here with a new (to me anyway) type of bracelet --A Wrap Bracelet.  A friend, Leslie Wayment, that I did a bead swap with a month or so ago posted a photo of some Wrap Bracelets on facebook.  (check out her bead store AA Beads & More)  I commented that I wanted to learn how to make them and she offered to do a Skype class with me--she's in Florida...I'm on Maui.  What fun! Made my first one in about an hour with Leslie's great instructions.  Here it is....


Isn't it cool?!  Thanks again Leslie!  I love the look of the long wraps that go around a few times like this one I saw on the back of the Sundance Catalog...


Did you get a load of the price on that thing?  $198 - Whoa! That's why I wanted to learn how to make them.  I do like the look of that one but I thought I'd try something a bit different.  I was making some little bird's nest charms for a swap and saw a bracelet on Pinterest that used something like it.  Here's the design I came up with....


This one is about 24 inches to make the three wraps around my wrist.  I like the look of the different sizes of beads.  There are some silver and copper flower beads mixed in there too.  Thinking there will be an ocean themed one coming shortly!  

I sent Leslie some of my bottle cap beads in our Cup of Beads trade that she wants to learn how to make them.  We will be doing a Skype class for those very soon.  Wondering how it would work with a few people on Skype....  We'll have to experiment!  By the way--Leslie is a great teacher and she has other great teachers at her bead store from what I hear.  If you're in her part of Florida, you might want to stop in for yummy beads or to take a class! 


Sunday, June 03, 2012

Too Funny!

Have to share this great book I found with my art buddies who love to needle felt....and love cats too!  Although the technique would most likely work with soft doggy hair or bunnies or hamsters or gerbils or mice, etc. but we all know CATS RULE!


Is that just the funniest book you've ever seen?!  It has lots of very cool projects for you and your kitty
in addition to very clear instructions for needle felting.


Years ago, my sister had a large loom she wove blankets and other things on.  For awhile she collected her dogs' hair after she brushed them to weave it into the blankets she made for them.  I always thought that was weird. Thinking maybe she might view this as a bit odd, but we know different, right?!  I'd love to see pics of your treasures you make :)

Saturday, April 28, 2012

ART CHARMS!!

Aloha and Happy International Charm Day!  We just got back from a trip for our grandson's first birthday.  Great time had by all.  Got home and realized I almost missed Charm Day! So here is a quick post with a couple of charm goodies.


In my arm charm group (started by the fabulous Chris and Peg mentioned in earlier posts along with their wonderful Art Charm book) we had a recent swap with Zentangle Charms.  Not sure what a Zentangle is? Little black and white drawings filled with cool designs--go HERE to see Rick and Maria's site.  I wanted to do something different with my great charms.  I have a little Zentangle book I've been playing in for awhile.  I made the book in a class with Traci Bautista years ago but never really worked on the binding.  


Zentangle charms + unfinished Zentangle Book = way cool finished book :)


These are my charms........


Here are a couple of the inside pages......


Another recent swap was our Winter Quick Swap.  Martha, our host, has been hosting a little quick swap each season during this past year.  I will be putting them together for a 'Season Mobile' when the year of swapping is finished. Here are some samples I've been playing around with. Since the swap was in groups of 5 charms, I added a few from other swaps that fit in with the seasons.  I think the finished mobile will be way cool.


Well, guess that's about it from me for now.  Be sure to check out Amber Dawn's Blog for more on INTERNATIONAL CHARM DAY  -- our blog hop hostess.  She has links to lots of happenings for the special day--charm give aways and sales from different Art Charmers. Don't pass up the chance to browse Amber's blog to see some of the AMAZING charms she creates while you're there.  Enjoy!!


Monday, January 09, 2012

Bottle Caps, Bottle Caps and more Bottle Caps!

Aloha!  Think this will be a long post since I have so many pictures to share.  Maybe that will make up for not posting in so long :)  Lots has been going on but somehow I don't seem to ever sit down to share things with you...sorry about that!

I've been making several jewelry pieces but for now I want to share a combination of my two favorite obsessions.... my little grandson, Sammy and Bottle Caps.  Last summer (check out the earlier posts) I had fun making some Sammy jewelry using Samuel Adams bottle caps.  Since DH and I don't drink beer, I was having a hard time finding friends to drink enough Samuel Adams beer to have bottle caps to play with.  After confessing I had poured some down the drain to get the caps, friends have been making sure I have enough  to play with without ever letting that happen again!!

I find them at my front door....


(mahalo Rita!)

I find them on my lanai....


(mahalo Mary!)

and friends have hit up bars.....


(mahalo Bruce and Dave!)

and of course have my Art Charm Buddies sending me ones in the mail  (mahalo nui loa!)

So now I have the bag above and....


this nice, big jar of caps to play with--Woohoo!  Have quite a collection of different kinds of caps now.  I've been putting them to good use too.  Some, I domed then soldered together and some I left flat, added photos, sealed them in resin. I also tried a new technique I found in the Nov. Cloth, Paper, Scissor magazine on a few where they are domed and covered with rice paper.  They're pretty cool too.


 My favorites are the ones with Sammy photos of course!


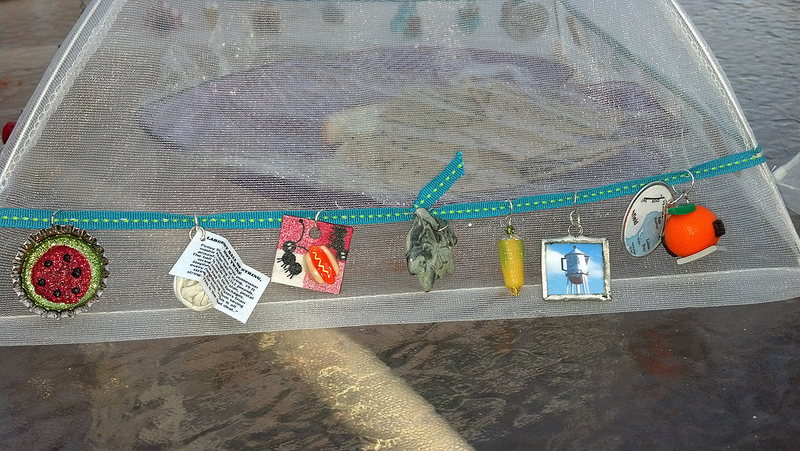
And here are some of the things I made with them....

A bracelet and earrings for me and a set for Sammy's Mom, Keely.


And a necklace & earring set for someone special in Sammy's life - you know who you are :)

Have more bracelets and necklaces in the works for other special people in Sammy's life too.  So fun!  Thinking I'll try making some key chains or something along that line... Dads and Papas need Sammy things too :)

So...thought I give you a couple of pointers in case you'd like to try making some bottle cap goodies for yourself.  The first bottle cap balls I made were a bit smaller.  I cut the ruffly part off with tin snips before I domed them with the dapping block. If you are using tin snips, please, please, please, be careful!  I got so many cuts from those sharp edges!  You could probably use a metal punch set but it would have to be a really strong one to cut that thick metal. Here is a pic of the dapping block in case you're wondering what the heck that is!


It's a clever little gadget usually made out of steel with several sizes of concave half circles.  Using a hammer, steel punches of corresponding sizes are used to form a flat piece of metal into curved shapes. On those first ones, I started with the largest half circle and worked my way down until I had it domed to the size I wanted.  Took forever!  Later found that you don't really need to start out larger--just go with the size you want and go slowly.  I tried some without trimming off the ruffle and think I like those better.  Just so plump and fun!  Next I held the two halves together and sealed the edge with copper foil tape and soldered them together just like you do when you're making a Stained Glass piece. (Always use solder that does not contain lead when you're using it in jewelry or anything that would touch your skin).  Be sure to burnish the foil well to the metal.

I found a great tutorial on YouTube (sorry, I couldn't re-find it to give credit to the right person) on how to remove those pesky plastic liners from the inside the caps.  She used a little hot plate like you use for keeping your cup of coffee warm at your desk and set the caps on for a few seconds each. For the ones she was doing, she left one cap on the warmer for 7 seconds and another brand for 9 seconds.  Can't remember which ones she was using, they weren't ones I have in my stash, but I was surprised different ones took different times.  Sure enough, each cap brand behaves a bit differently.  One Hawaiian brand beer cap just kind of melted away, some just popped off easily, and others took a bit of tugging. Instead of using a coffee cup warmer (since I don't have one!) I used the heating plate of our coffee maker.  I just put several caps down on the warming plate instead of doing them one at a time. Picked the cap with pliers after it heated up and grabbed the liner with a needle tool and lifted it off.  The caps do get hot so don't grab them with you fingers! Got those liners off in no time!!


Hope this inspires you to up-cycle some bottle caps!